本文来自于我自己配置两台 macOS 开发环境的过程,主要记录一些常用的配置技巧
¶系统设置
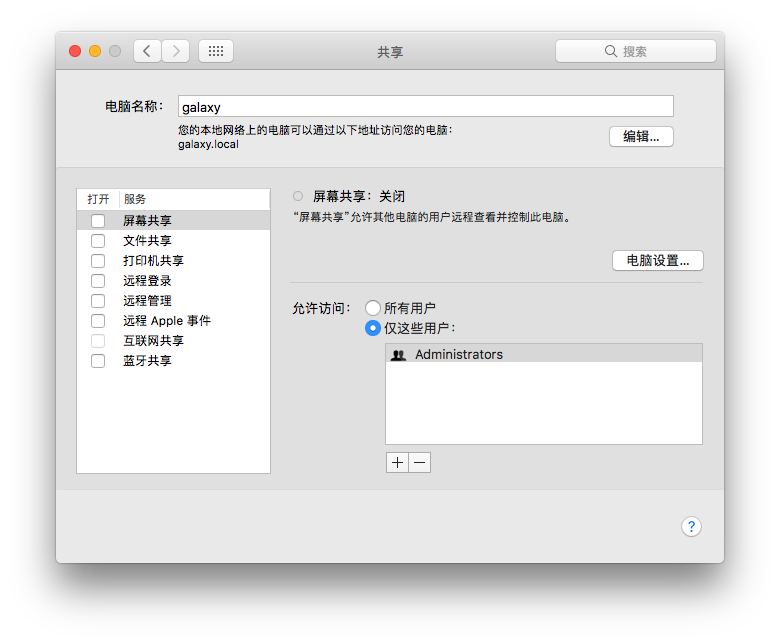
¶更改计算机名称
macOS 默认的计算机名称「xx的xx」,我一般会把这个名字改成英文,在命令行中看起来会漂亮一点。修改 系统设置-共享-电脑名称 即可
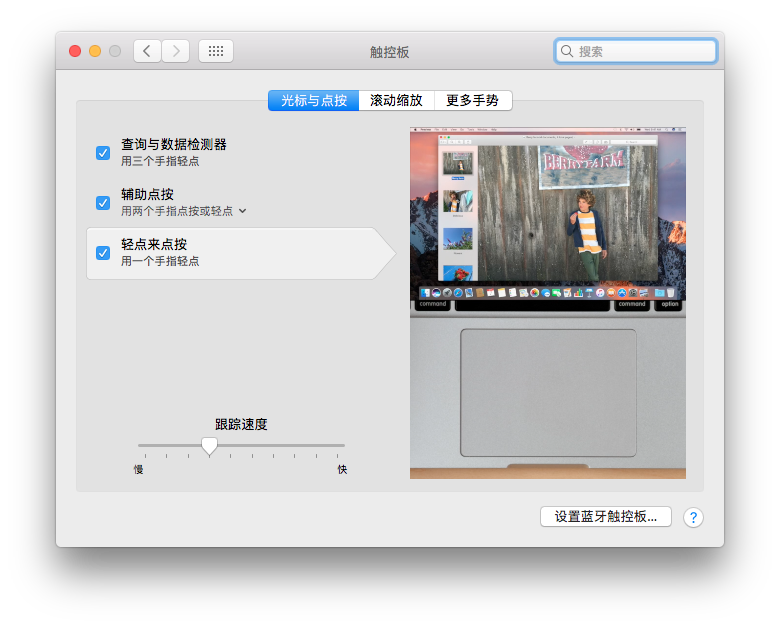
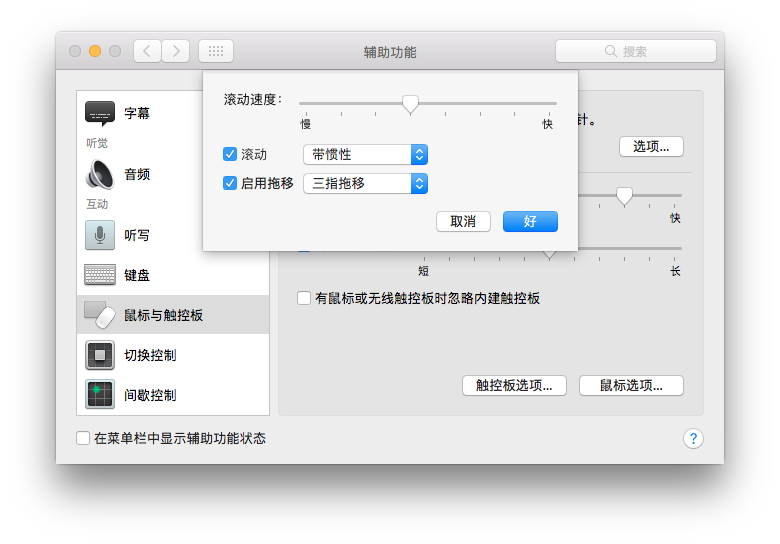
¶触控板
- 设置轻点触控板为鼠标点击
- 设置三指拖动
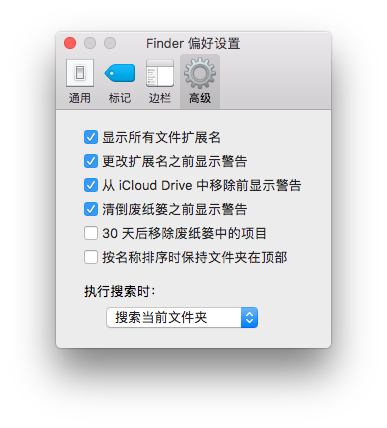
¶Finder
- 开启新 Fidder 窗口时打开
桌面 - 执行搜索时
搜索当前文件夹 - 显示所有文件扩展名
¶其它
系统偏好设置-键盘-输入法-自动切换到文稿输入法应用切换的时候会保持原来的输入法不变桌面空白处右键-排序方式-贴紧网格右键整理图标的时候就会按网格排列
¶开发环境设置
¶安装 Command line tools
方便后续编译安装其它应用
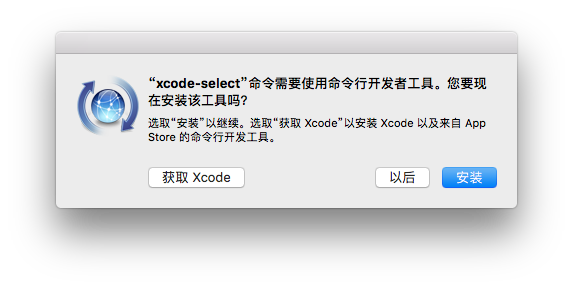
xcode-select --install
¶安装 brew
一般命令行的工具,或者开发环境包都用 brew 来安装。GUI 的应用直接去网站下载安装包即可,App Store 我一般用来购买安装一些收费软件
打开命令行执行下面的命令来安装 brew
/usr/bin/ruby -e "$(curl -fsSL https://raw.githubusercontent.com/Homebrew/install/master/install)"
使用下面的命令替换 brew 源为中科大镜像
# 替换brew.git:
cd "$(brew --repo)"
git remote set-url origin https://mirrors.ustc.edu.cn/brew.git

# 替换homebrew-core.git:
cd "$(brew --repo)/Library/Taps/homebrew/homebrew-core"
git remote set-url origin https://mirrors.ustc.edu.cn/homebrew-core.git
由于 brew 安装下载源码包有时是用 curl 的,所以可以配置下 curl 来走 番习习墙 代理,我一般在配置文件中设置 vim ~/.curlrc
socks5 = "127.0.0.1:1080"
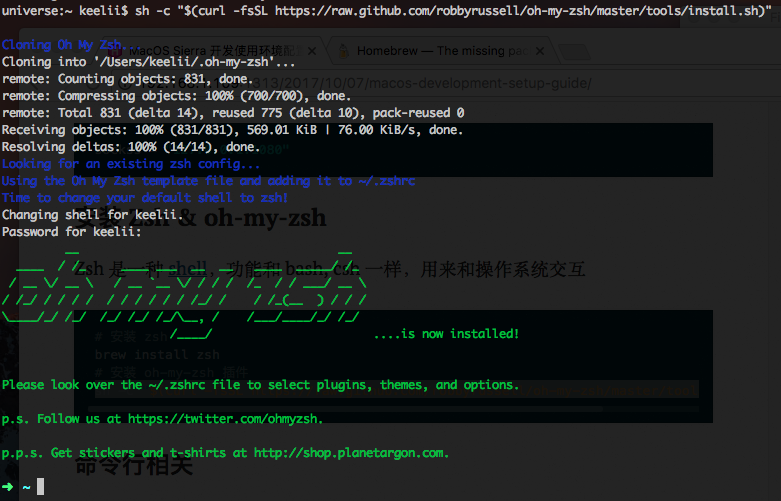
¶安装 Zsh & oh-my-zsh
Zsh 是一种 shell,功能和 bash, csh 一样,用来和操作系统交互
# 安装 zsh
brew install zsh
# 安装 oh-my-zsh 插件
# 更换默认 shell 为 zsh
chsh -s /bin/zsh
sh -c "$(curl -fsSL https://raw.github.com/robbyrussell/oh-my-zsh/master/tools/install.sh)"
安装成功的话会有下面的提示
安装自动补全提示插件 zsh-autosuggestions
git clone git://github.com/zsh-users/zsh-autosuggestions ~/.zsh/zsh-autosuggestions
source ~/.zsh/zsh-autosuggestions/zsh-autosuggestions.zsh
¶安装/配置 iTerm2
下载 并安装,打开 Preferences 偏好设置
General关闭Native full screen windows我不使用系统的全屏(因为有过渡动画),是为了使用全局快捷键 立即 调出命令行Profiles-Window-Transparency设置透明度 10%~20% 即可,太高会和桌面背景冲突。如果需要临时禁用透明度可以使用快捷键⌘+uKeys-Hotkey设置全局显示隐藏快捷键 系统级别的快捷键设置为⌘+\
最佳实践,启动 iTerm2 后按
⌘+enter全屏,然后⌘+\隐藏它,这时候就可以做别的事情去了。任何时间想再用 iTerm2 只需要按⌘+\即可
¶brew 常用工具
下面这些都是用 brew 安装的,即 brew install xxx
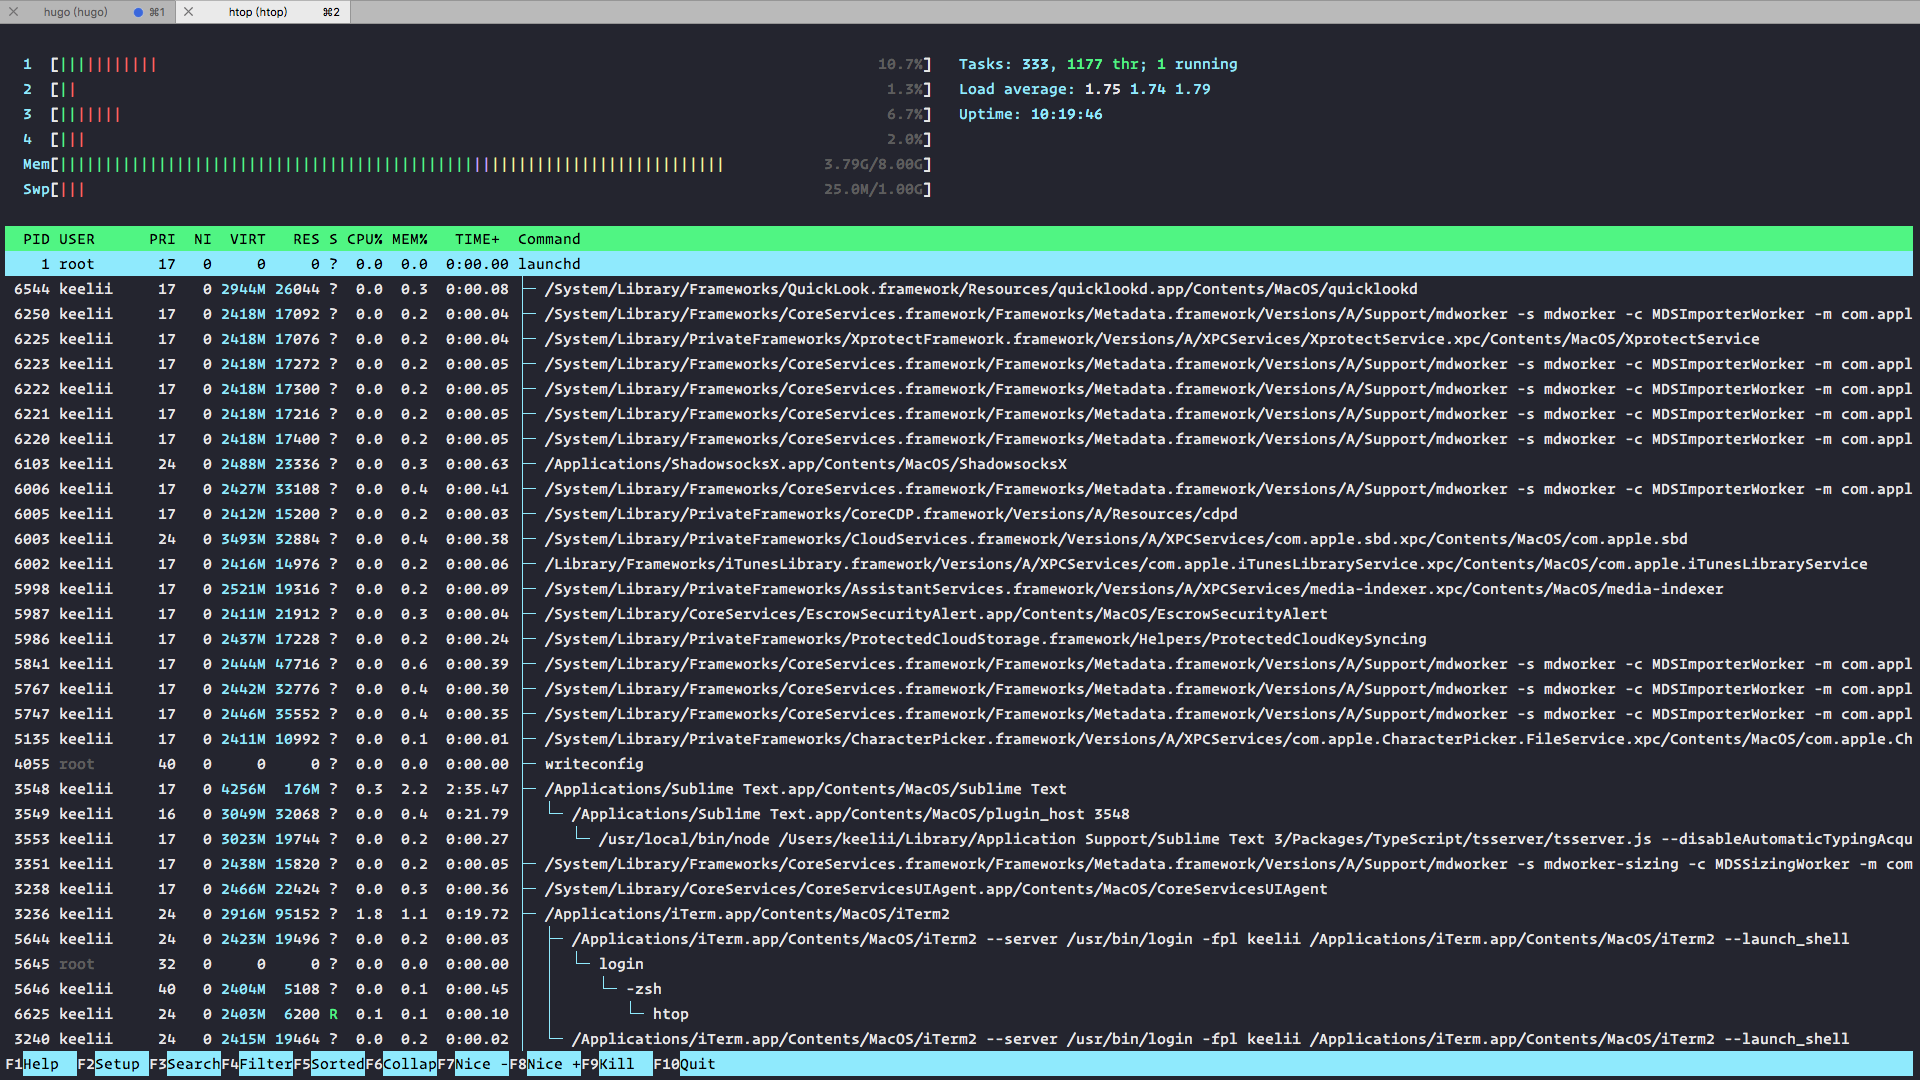
¶htop
用来查看当前运行的程序,top 命令的升级版
¶tree
显示文件为树形菜单
➜  keelii.github.io tree . -L 2
.
├── config.toml
├── content
│   ├── about
│   └── archives
├── deploy.sh
├── public
│   ├── 2016
...
│   └── tags
└── themes
    └── octo-enhance

17 directories, 8 files
¶httpie
使用比 curl 简单多了,而且还有一些代码高亮的效果
¶vim
安装 vim 添加一些默认的模块和编程语言支持 cscope, lua, python 并且覆盖系统默认的 vim
brew install vim --HEAD --with-cscope --with-lua --with-override-system-vim --with-luajit --with-python
安装 vim-plug
curl -fLo ~/.vim/autoload/plug.vim --create-dirs https://raw.githubusercontent.com/junegunn/vim-plug/master/plug.vim
¶autojump
方便在命令行中快速跳转目录,安装后程序会读取你 cd 过的目录并存起来,方便后面用快捷方式调用,支持模糊匹配。注意: autojump 只会记录安装后使用 cd 命令进入过的目录
¶yarn
npm 的替代品,Production Ready。如果系统中安装过 node,就使用 yarn --without-node 命令只安装 yarn 工具
¶安装 python pip
下载 get-pip.py 在命令行中使用 python 运行这个文件
sudo python get-pip.py
¶更改各种程序语言包源
¶ruby - .gemrc
gem sources --add https://mirrors.tuna.tsinghua.edu.cn/rubygems/ --remove https://rubygems.org/
gem sources -l
cat ~/.gemrc
---
:backtrace: false
:bulk_threshold: 1000
:sources:
- https://mirrors.tuna.tsinghua.edu.cn/rubygems/
:update_sources: true
:verbose: true
¶node - .yarnrc/.npmrc
cat ~/.yarnrc
registry "https://registry.npm.taobao.org"
disturl "https://npm.taobao.org/dist"
electron_mirror "http://cdn.npm.taobao.org/dist/electron/"
node_inspector_cdnurl "https://npm.taobao.org/mirrors/node-inspector"
sass_binary_site "http://cdn.npm.taobao.org/dist/node-sass"
¶dotfiles 配置文件
可以参照我的 dotfiles 配置文件
¶其它 GUI 应用
- Alfred 程序启动器
- The Unarchiver ⇒ 解压工具
- Magent ⇒ 排列窗口(付费)
- Itsycal ⇒ 简洁版日历
Snip ⇒ 屏幕截图Snappy ⇒ 屏幕截图、修改分享- Snipaste ⇒ 更好用的屏幕截图
- Paste 剪贴板管理工具(付费)
- Typora 正确的使用 markdown 写文档笔记等
- Karabiner-Elements ⇒ 改键器, 改键方案参照上篇
- AppCleaner 2 ⇒ 卸载应用
- licecap for mac ⇒ 录制 gif 图片
- Go2shell ⇒ Finder 当前目录打开命令行